Month-End Close
A step-by-step checklist for closing your books at the end of each accounting period.
This workflow ensures every transaction that belongs to the month is recorded before you move on. Follow the steps in order — each step cleans up the data that the next one reviews.
Admin-only pages
The MONEY group (Invoices, Payments, Accounting) and several pages referenced below are only visible to users with the Admin account type. Staff-level users will not see them in the sidebar.
GL Reports and Periods tabs require FilaOps Pro
The GL Reports tab (Trial Balance, Inventory Valuation, Transaction Ledger) and the Periods tab (fiscal period close/lock) are Pro-tier features and are not covered here. Core users export CSVs and close periods manually outside FilaOps.
The Flow
graph TD
    A[Ship Remaining Orders] --> B[Record All Payments]
    B --> C[Receive Open Purchase Orders]
    C --> D[Complete Production Orders]
    D --> E[Review Accounting Reports]
    E --> F[Export for Records]
Step 1 — Ship Remaining Orders
Revenue is recognized at shipment (accrual accounting, per GAAP). Any order still in Confirmed or In Progress status at month-end will not show up in your revenue reports until it ships.
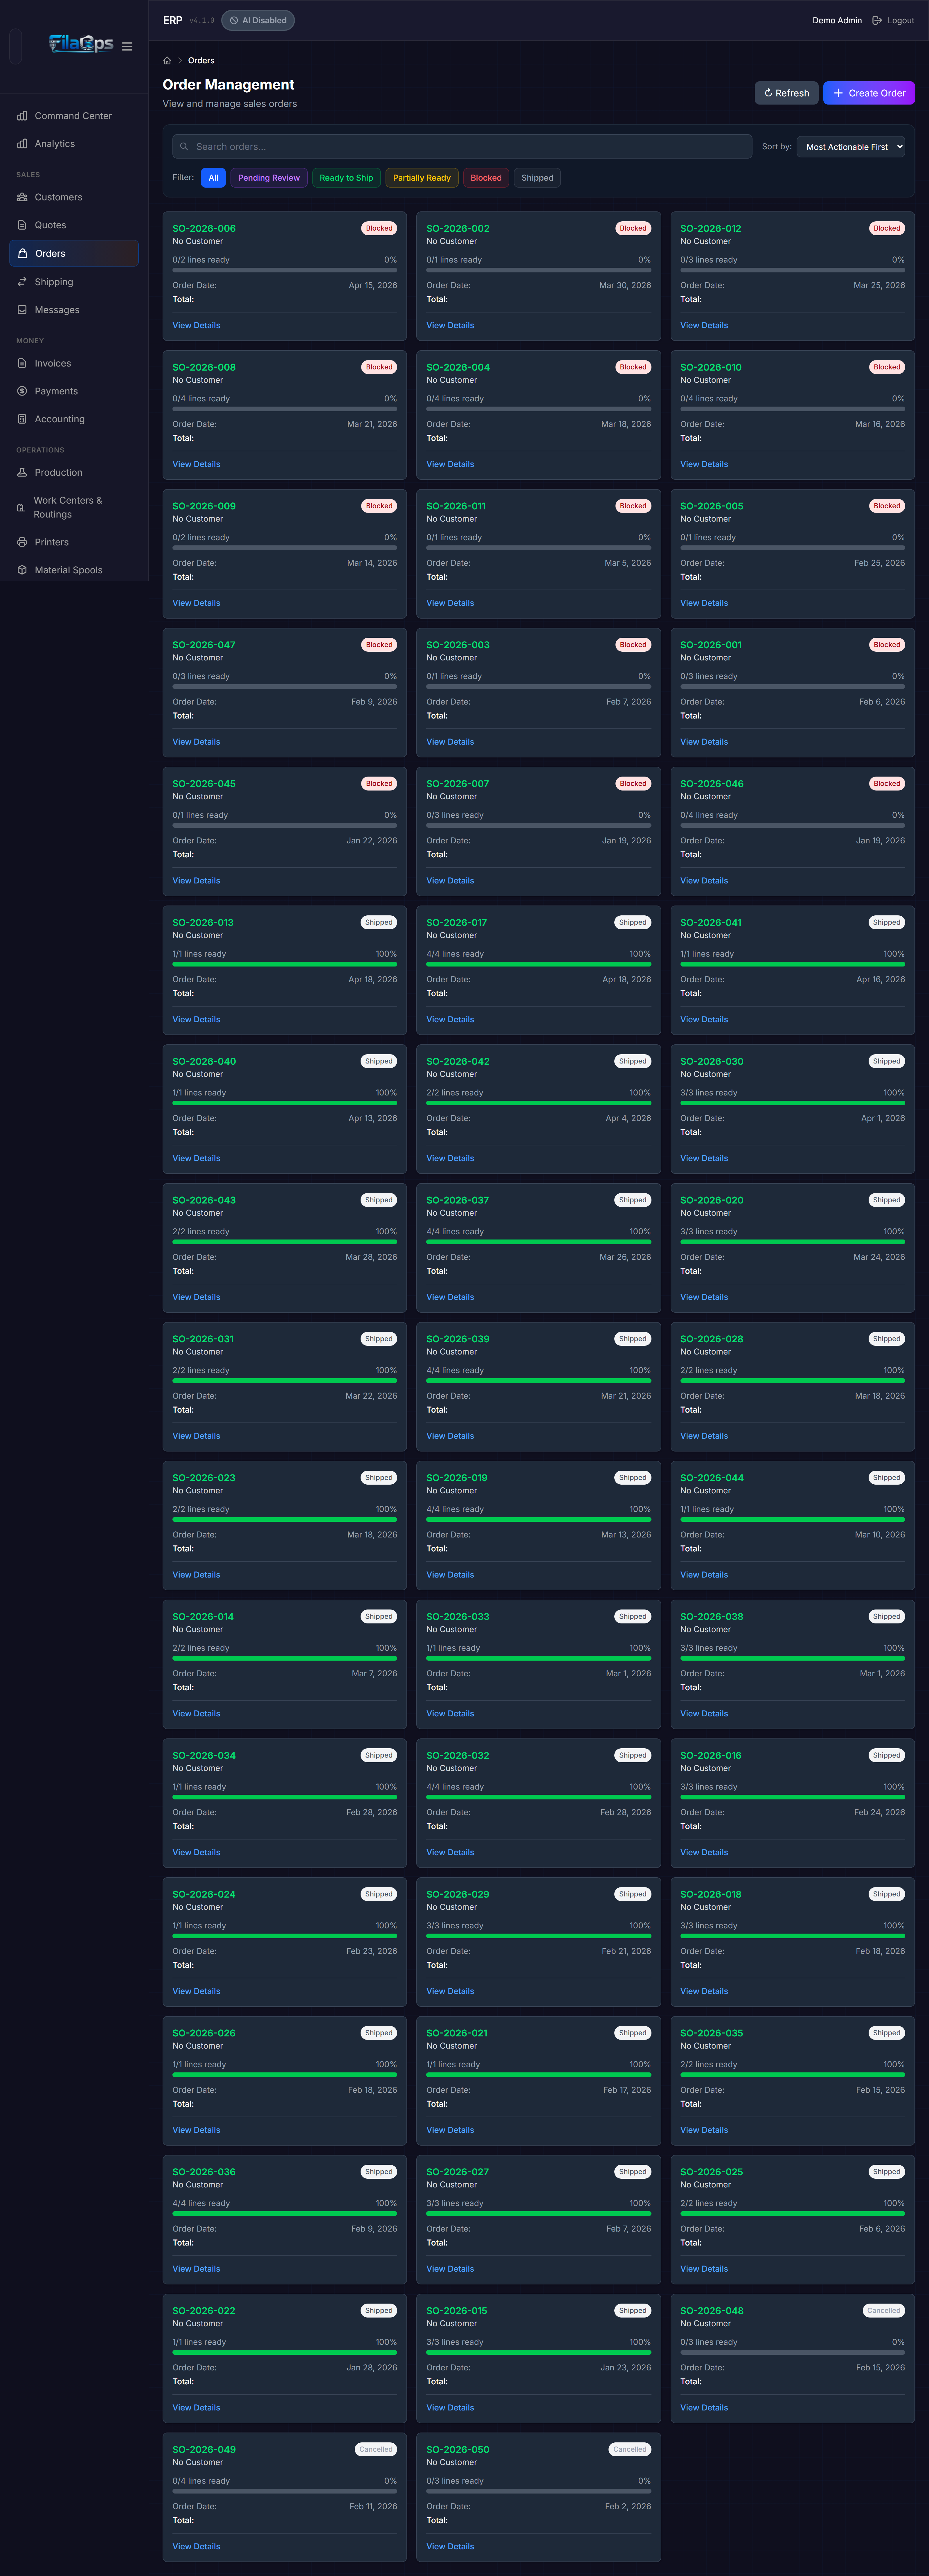
Where: Sidebar → SALES > Orders
- Scan orders with status Confirmed or In Progress.
- For any order physically delivered this month but not yet shipped in FilaOps, open the order and mark it shipped now.
- The ship date is recorded at the moment you click Ship. If the delivery occurred earlier in the month, the revenue still falls in the correct calendar month as long as you mark it shipped before midnight on the last day.
Ship dates are immutable
FilaOps uses the timestamp at the time you click Ship for revenue recognition. You cannot change it afterwards. If a shipment genuinely occurred in a prior month, note it in the order's internal notes and flag it for your accountant.
Orders vs. Invoices
The Invoices page (MONEY > Invoices) shows the same orders formatted as invoice documents. Shipping an order is the trigger for revenue recognition — not creating an invoice. Invoices are a separate document step.
Details: Taking and Fulfilling Orders
Step 2 — Record All Payments
The Payments page only reflects cash you have explicitly recorded. If a bank transfer cleared or a check was deposited this month, enter it now.
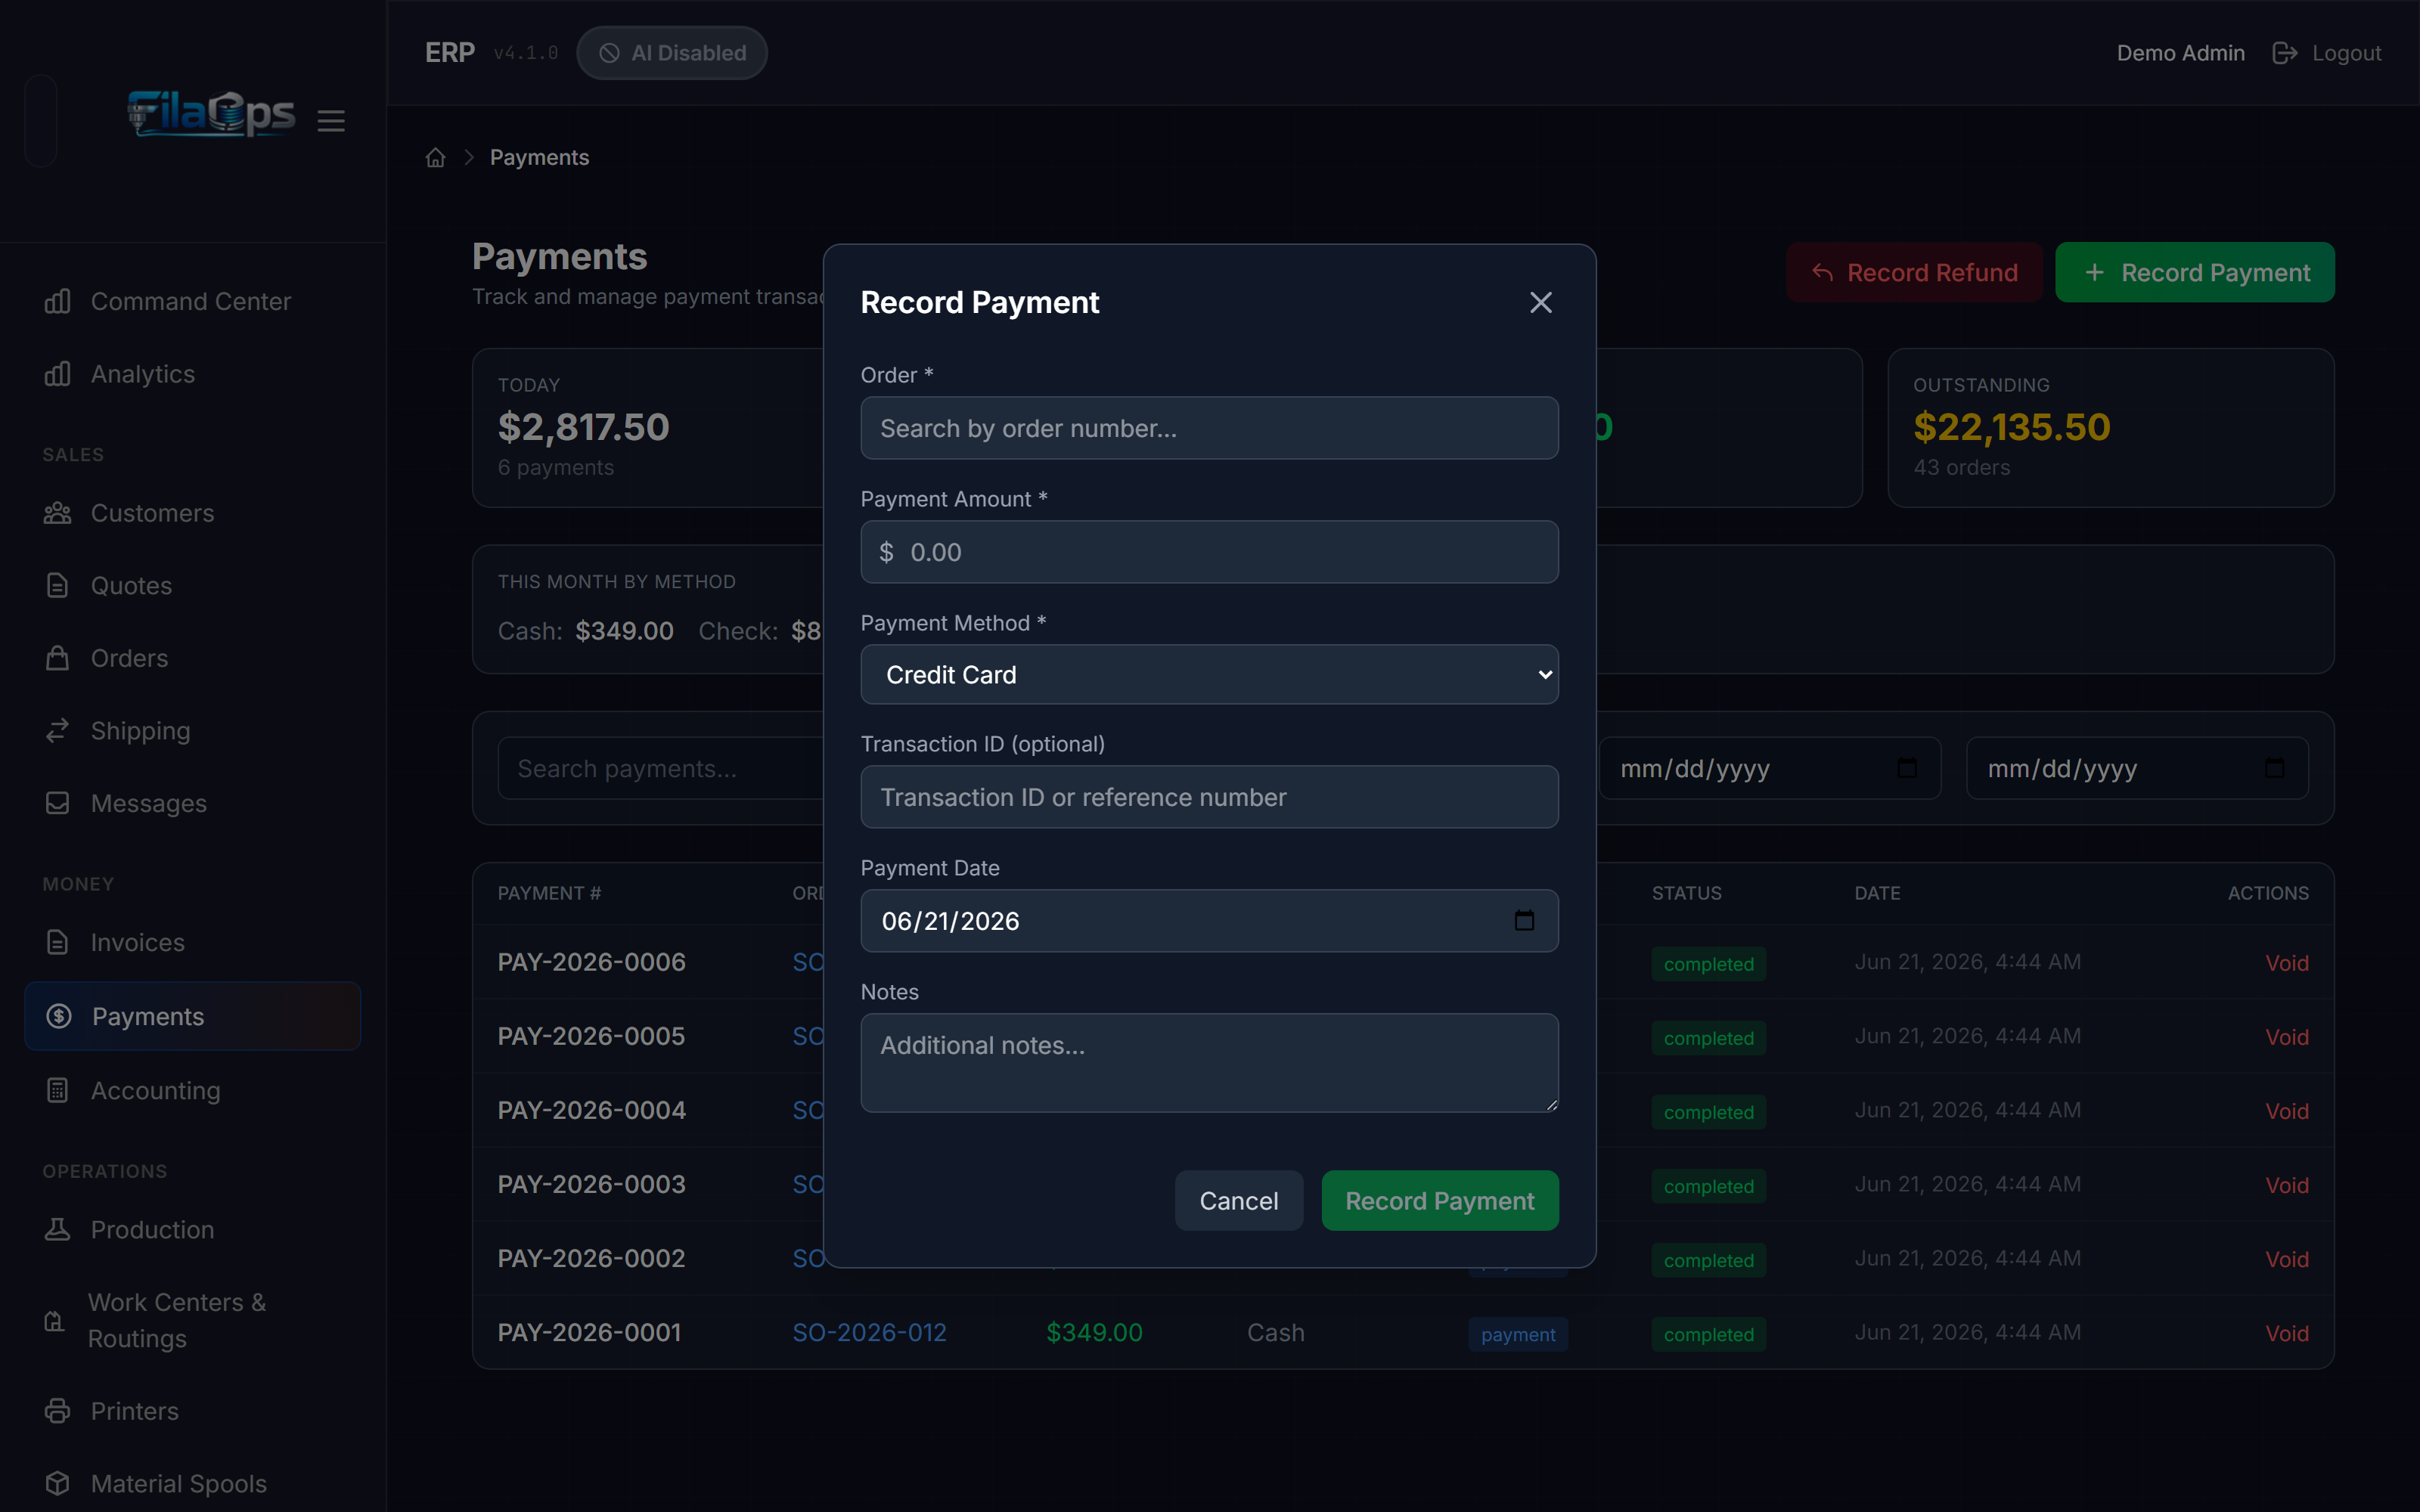
Where: Sidebar → MONEY > Payments (admin only) — or open an individual order and click Record Payment from the order detail.
- Go to MONEY > Payments and check the date range for the full month. Any gap between what you expect and what is listed points to payments you still need to record.
- Alternatively, go to SALES > Orders, filter for Payment Status = Unpaid or Partial, open each order, and click Record Payment.
- In the modal, enter the amount, payment method (Cash, Check, Credit Card, Wire, etc.), and any transaction reference.
- For refunds, click Record Refund and enter the amount as a positive number — the type field marks it as a refund automatically.
Details: Recording Payments
Step 3 — Receive Open Purchase Orders
Materials received from purchase orders are capitalized into inventory at their cost. Any PO not yet received will understate your inventory and overstate your accounts payable balance for the month.
Where: Sidebar → PURCHASING > Purchasing → Purchase Orders tab
- On the Purchase Orders tab, filter for POs with status Ordered or Partial.
- For any deliveries received this month but not yet processed, open the PO and click Receive.
- Enter the quantities actually received and confirm.
- Receiving a PO updates on-hand quantities and records the material cost into inventory, creating an accounts payable liability to the vendor.
Partial deliveries
If a vendor shipped only part of the order, receive what arrived. The remainder stays open and carries forward to next month — that is correct behavior.
Details: Ordering Supplies
Step 4 — Complete Production Orders
Open production orders that are genuinely finished need to be closed so their costs move from Work-in-Progress (WIP) to Finished Goods.
Where: Sidebar → OPERATIONS > Production
- Filter the production queue for orders with status In Progress.
- For any job that finished this month, open it and click Complete.
- For any job that failed or was abandoned, click Scrap and select a scrap reason.
- Leave jobs that are genuinely still running open — they carry forward correctly.
Only close orders that are physically done
Closing a production order finalizes all its material consumption and labor. Do not close prematurely.
Details: Running Production
Step 5 — Review Accounting Reports
With all transactions recorded, go to MONEY > Accounting and review each tab for the month's activity.
Where: Sidebar → MONEY > Accounting (admin only)
The Accounting page has five tabs available in Core:
| Tab | Purpose |
|---|---|
| Dashboard | Month-to-date snapshot across seven KPI cards |
| Sales Journal | Line-by-line list of every shipped order in a date range |
| Payments | Cash collected, broken down by payment method |
| COGS & Materials | Direct material costs and gross margin for shipped orders |
| Tax Center | Tax collected by rate, with export for filing |
Dashboard tab
The Dashboard gives a snapshot of the current month-to-date position:
| Card | What it shows |
|---|---|
| Revenue MTD | Revenue recognized at shipment (excludes tax), month-to-date |
| Revenue YTD | Year-to-date shipped revenue |
| Cash Received MTD | Actual payments collected this month (cash basis) |
| Accounts Receivable | Outstanding balance owed by customers |
| Sales Tax Liability MTD | Tax collected on shipped orders — a liability, not revenue |
| COGS MTD | Direct material costs of shipped goods |
| Gross Profit MTD | Revenue minus COGS, with gross margin percentage |
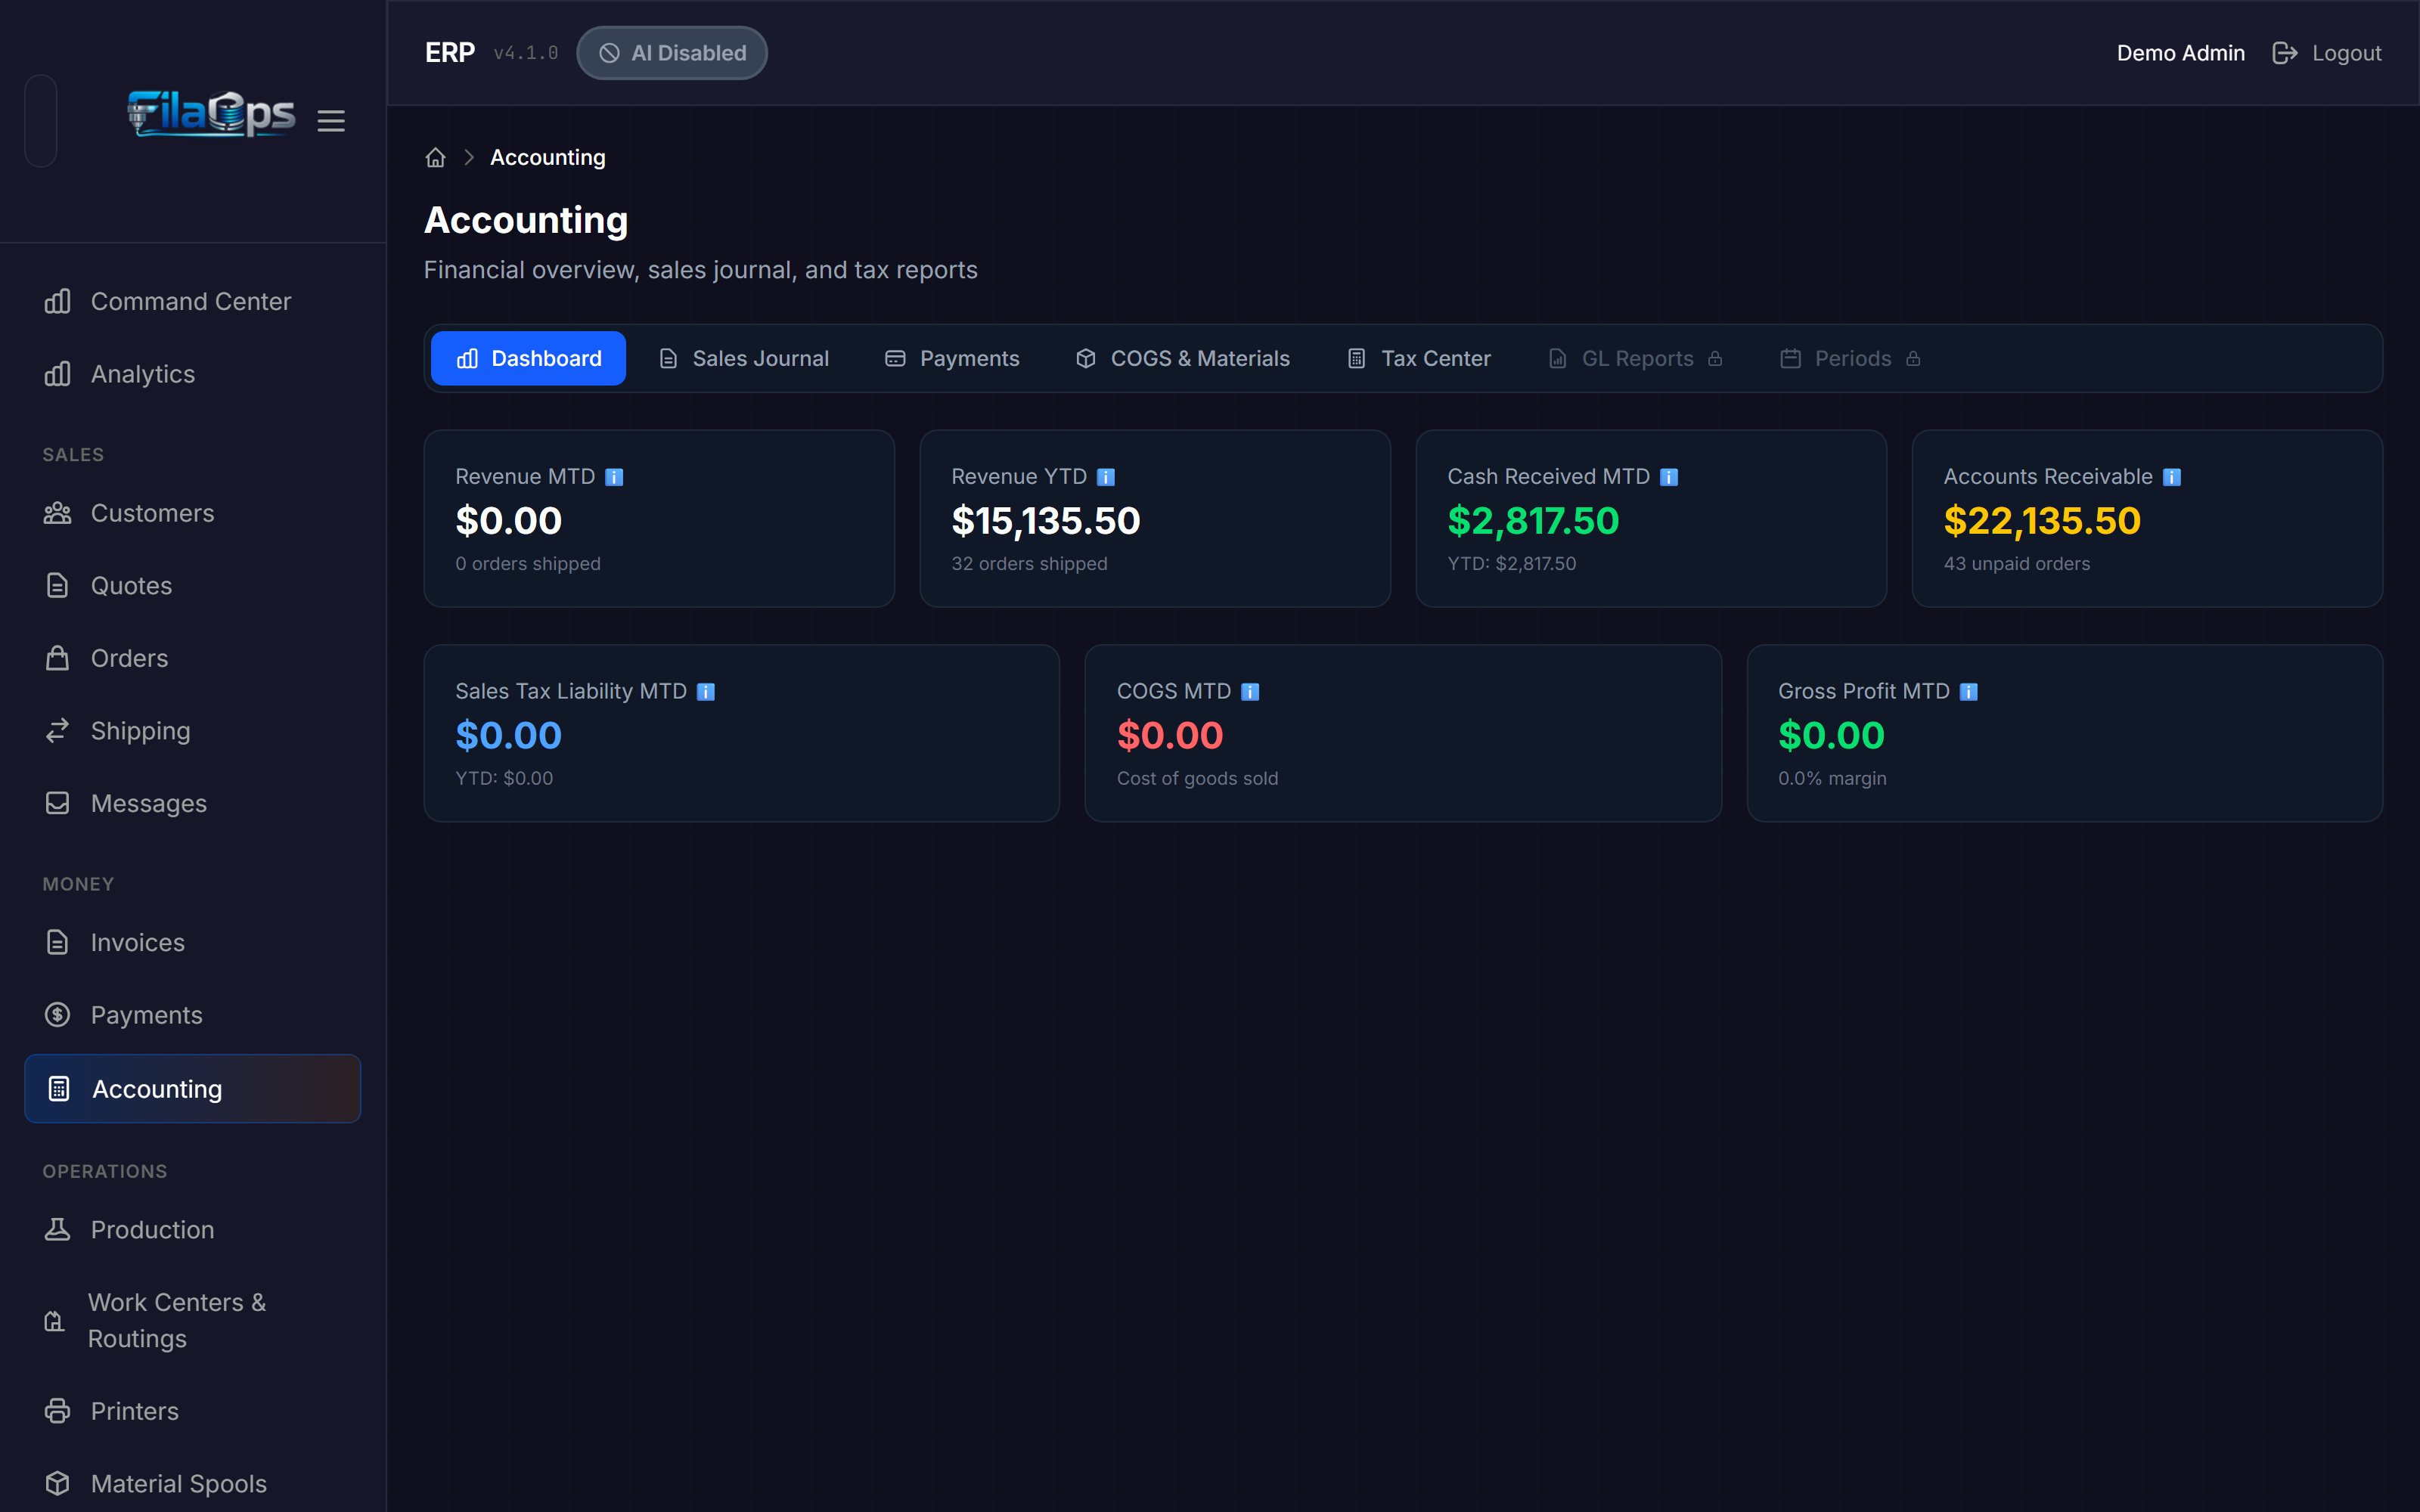
Check that Revenue MTD matches the orders you know shipped this month, and that the gross margin percentage is consistent with prior months. A large swing usually means a cost was mis-categorized or a shipment was recorded twice.
Sales Journal tab
- Set Start Date to the first of the month and End Date to the last day.
- The summary row shows Orders, Subtotal, Tax, Shipping, and Grand Total for the period.
- Scan the entry rows — each row is a shipped order. Verify the Status column (shipped/completed) and the Payment Status column (paid/partial/unpaid).
- If an order appears that should not be in this period, its ship date is incorrect — investigate before closing.
Payments tab
- Set the date range to the full month.
- The summary cards show total Payments, Refunds, and Net received, plus a Transactions count.
- Expand the By Payment Method section and compare each method's total against your bank statement or payment processor report.
- Each row in the table shows a Payment #, the linked order, Method, Amount, and Type (payment or refund).
COGS & Materials tab
- Use the Period dropdown to select Last 30 days (or the range that best aligns with the calendar month).
- The summary cards show Orders Shipped, Revenue, Total COGS, and Gross Profit for the period.
- The COGS Breakdown panel splits total COGS into Materials, Labor, and Packaging.
- Shipping expense, if any, appears below the COGS total as an operating expense (not in COGS).
Tax Center tab
- Set the Period dropdown to This Month.
- The Tax Collected card shows the amount you owe your tax authority for the period. Note this figure before you file.
- If the Pending Tax card is visible, it shows tax on orders that have not yet shipped — these carry into next month when those orders ship.
- The By Tax Rate table breaks down collections across each rate you charge.
- Select This Quarter or This Year to see the Monthly Breakdown table, which gives a month-by-month history.
Tax is recognized at shipment
FilaOps uses accrual accounting — tax liability is triggered when an order ships, not when payment is received. The Tax Center reflects shipped orders only. Pending tax on unshipped orders is shown separately.
Details: Accounting
Step 6 — Export for Records
Download your reports before closing the period. These files serve as your audit trail and as source documents for your accountant or bookkeeper.
Where: Sidebar → MONEY > Accounting tabs — look for the export button on each tab
| Report | Tab | Button label | Saved filename pattern |
|---|---|---|---|
| Sales Journal | Sales Journal | Export CSV | sales-journal-{start}-to-{end}.csv |
| Payments Journal | Payments | Export CSV | payments-journal-{start}-to-{end}.csv |
| Tax Summary | Tax Center | Export for Filing | tax-summary-{period}.csv |
Each CSV starts with a disclaimer header reminding you that the file is for reference only and should be verified with a qualified accountant before use in tax filings.
Share with your bookkeeper
These three files give a bookkeeper everything they need to reconcile the month without direct access to FilaOps. Save them to a folder organized by year and month, for example 2026/06-June/.
Month-End Checklist
Copy this checklist into your monthly close document:
- [ ] All orders delivered this month are marked Shipped in FilaOps
- [ ] All payments received this month are recorded via Record Payment
- [ ] All material deliveries processed via Receive on their purchase orders
- [ ] Completed production jobs marked Complete; failed jobs marked Scrap with a reason
- [ ] Accounting Dashboard reviewed — Revenue MTD and Gross Profit look reasonable
- [ ] Sales Journal reviewed for the full month — order count and totals match expectations
- [ ] Payments tab reconciled against bank statement by payment method
- [ ] COGS & Materials reviewed — gross margin percentage consistent with prior months
- [ ] Tax Center Tax Collected figure noted for remittance
- [ ] Sales Journal CSV exported and saved
- [ ] Payments Journal CSV exported and saved
- [ ] Tax Summary CSV exported and saved